| Answer / Solution |
 |

Tiered Billing Rules Explained
Summary
Billing Models allow an Administrator to define how to compute charges for a Facility when the Billing Report is run. For more information on how to create a Billing Model, please see KB234. See KB125 for details on how to assign a Default Billing Model for a Facility. In addition to assigning a Default Billing Model, multiple billing models can be applied to a Facility by creating a Tiered Billing Rules. This article explains how to set up and manage Tiered Billing Rules for a Facility.
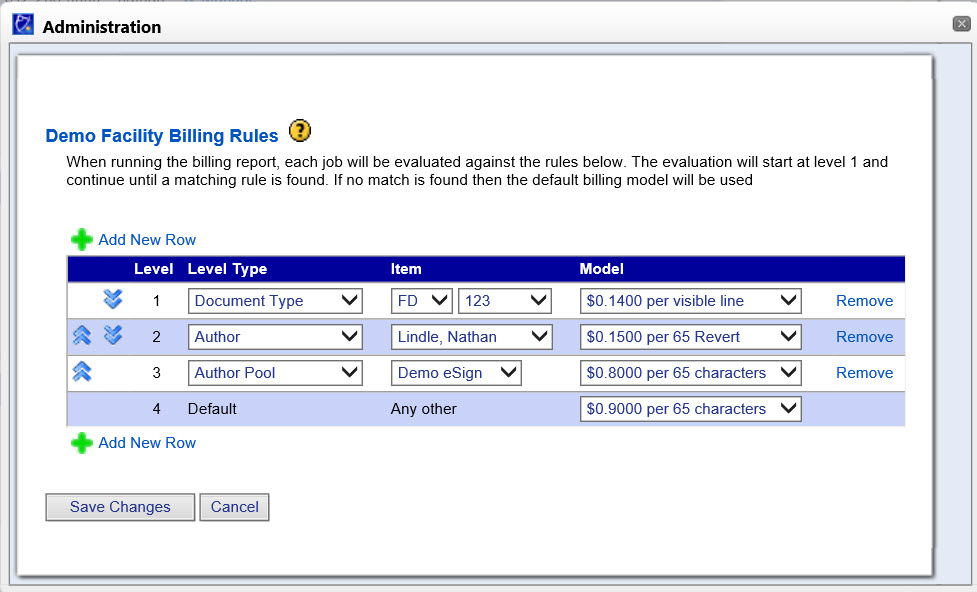
When running the billing report, each job will be evaluated against the rules specified. The evaluation will start at level 1 and continue until a matching rule is found. If no match is found then the default billing model will be used.
Note: This feature is currently in limited Beta release.
Steps
- Login to the InfraWare Management Console (IMC) with your Administrator Username and Password.
- Go to the Administration tab ⇒ Facilities sub-tab.
- Scroll down to the Billing section.
- Click on the Manage Rules link next to the setting for Default Billing Model for Billing Reports.

- A popup window will open with options for setting up and managing Billing Rules.

- To add a new level click on the link to Add New Row. A new row will be added to the listing.

- Select the Level Type from the drop-down menu. Options include:
- Document Type
- Author
- Author Pool
- Select the Item from the drop-down menu.
- If Document Type was chosen as the Level Type choose the Document Category from the drop-down menu and then choose the Document Type from the drop-down menu.

- Select Model from the drop-down menu listing all Billing Models which have been defined.
- Click the Remove link next to a row to remove it from the listing.

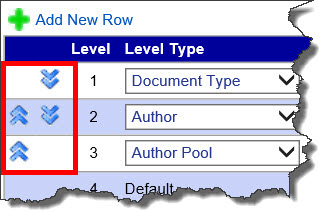
- When running the billing report, each job will be evaluated against the rules specified. The evaluation will start at level 1 and continue until a matching Rule is found. To move a row up or down the list click on the up/down arrow links to the left of the listing for each row.

-
Click on Save Changes.
|