| Answer / Solution |
 |

Dictating using InfraWare Mobile for iOS
Performing dictations on the InfraWare Mobile iOS application is quick and easy. First, launch and log into the InfraWare Mobile application on your iOS device.
There are two ways of performing dictations:
- Simple "free form" dictation: Manually enter any of the pertinent details about the dictation before submitting. This article will cover the details of creating a "free form" dictation.
- Dictate against the dictation schedule: Details of the dictation are pre-populated on the InfraWare Mobile platform. Doing dictations against a dictation schedule is covered in KB605 - https://KB.infraware.com/KB/afmviewfaq.aspx?faqid=605.
Steps
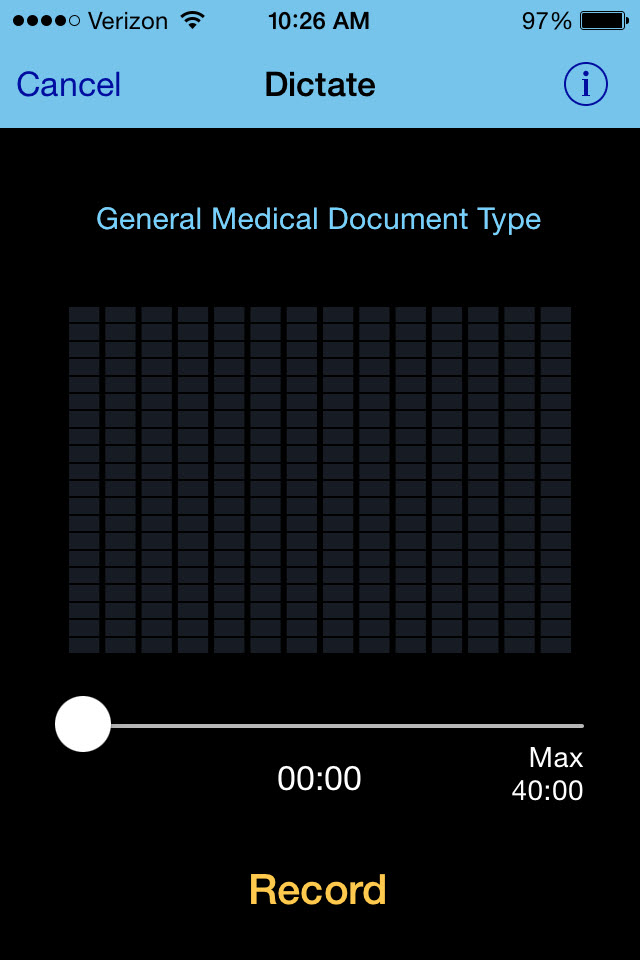
- Dictate: In the upper right hand corner of the "Workflow" screen (also on the "Facilities" screen, if you do work for multiple facilities) there is a "Dictate" button. Tapping this button will take you to the "Dictate" screen. Depending on your application settings, recording may start as soon as this screen is shown or after you tap the orange "Record" button.
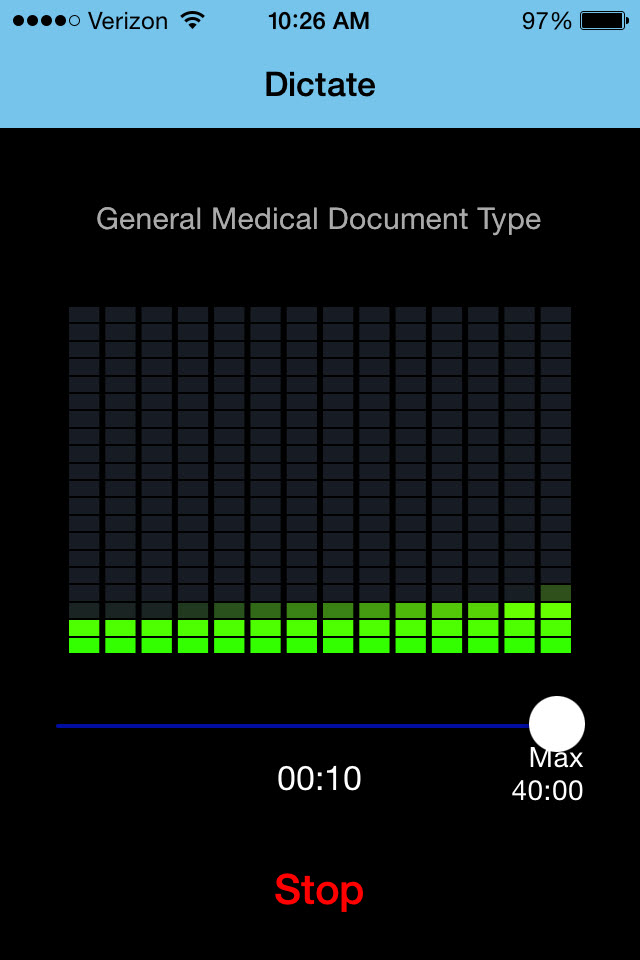
- While recording, a sound meter will show if audio is being detected by your device's microphone. After you are done dictating, tap the red Stop button.
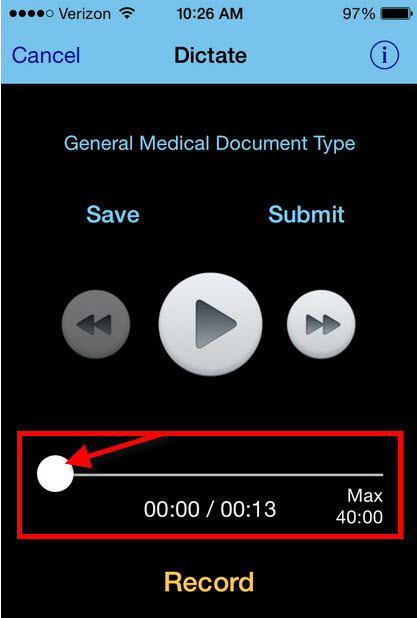
At this point you can listen to your recorded audio, record additional audio or complete the details about the job before saving or submitting.
- Play: To play the audio that has been recorded, use the rewind, play and fast-forward buttons that are shown.
.jpg)
- To change your location in the audio file just drag the position on the slider.
- Record: If additional audio needs to be added, tap the "Record" button again.

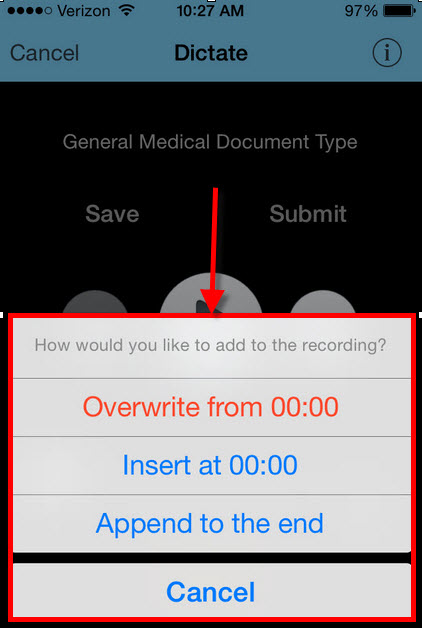
- You will be prompted to choose whether you want to insert at the current location, overwrite the recording, or append to your existing recording.
- Overwrite: The overwrite option will first delete everything from the original recording starting at the current position in the recording to the end, then append the new recording to what is remaining of the original recording.
- Insert: Choosing insert will insert the new recording into the old recording at the current position in the recording(shown in the timeline).
- Append: The append option will simply add the new recording to the end of the original recording.
- Cancel: Pressing Cancel will cancel the record operation and return you to the prior screen.
-
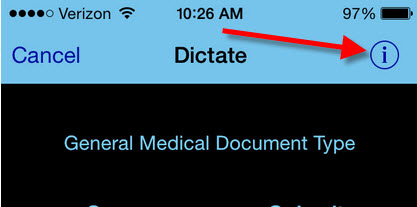
If you are done with the recording no additional details are required to be completed before the job is submitted. However, if you would like to specify job properties for the dictation, tap on the job properties icon in the upper right hand corner; this will display the "Job Properties" screen.
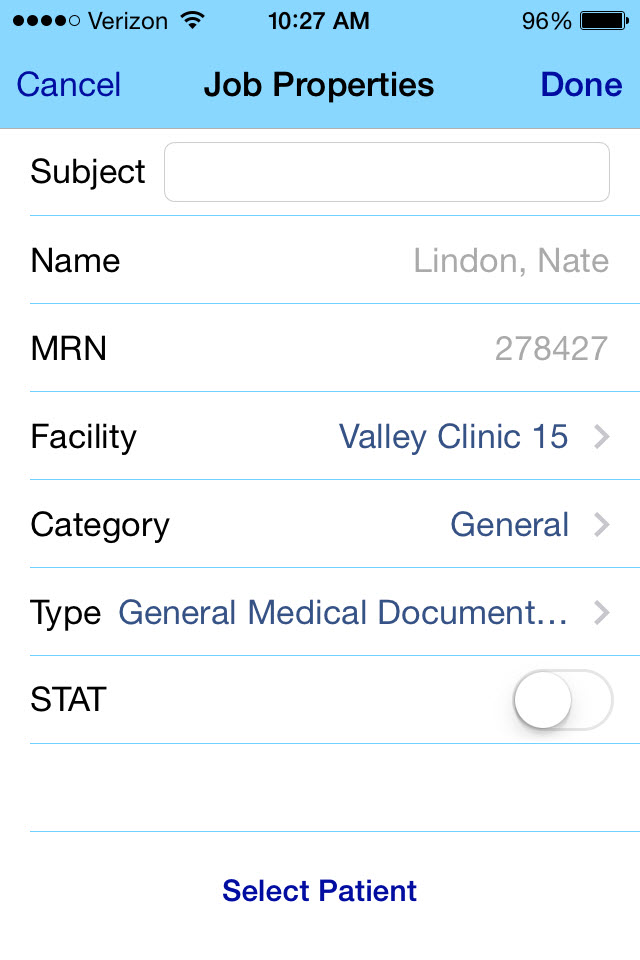
- Here you can fill out a subject, patient, facility, document category and type, and a STAT classification.
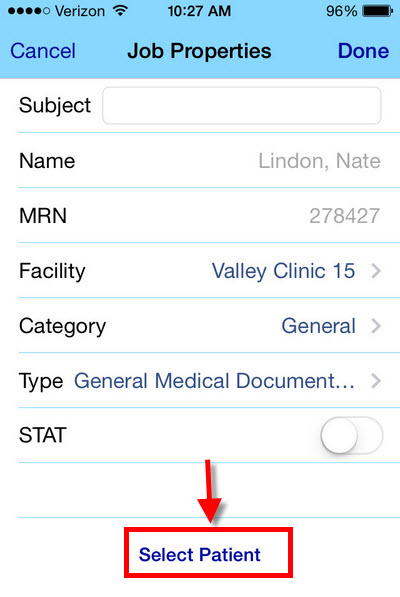
- If you wish to choose a patient for the dictation, tap on the "Select Patient" button at the bottom of the screen.
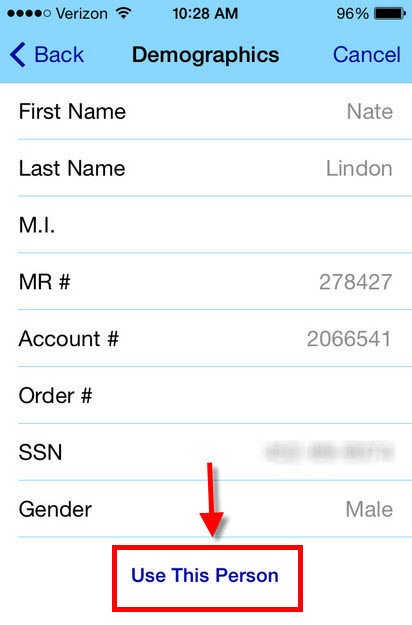
- This will take you to a screen where you can submit a search to our servers for the patient record you need. Tapping on the search results will show you the details of that patient that we have on our servers. Once you find the patient record you would like, tap the "Use This Person" button at the top of the details screen. This will take you back to the job properties screen with the patient name and MRN completed for you.
- Once you are satisfied with your dictation, you can tap either the "Save" or "Submit" buttons. Saving the dictation will simply save the dictation to your drafts queue on your device where it can be reviewed and/or submitted at a later time. Submitting the dictation will send the dictation to the InfraWare 360 platform to be worked.
|