| Answer / Solution |
 |

Upload Files from the Olympus DS-330 Explained
Overview
The InfraWare Dictation Client (IDC) v2009 can upload dictations from the Olympus DS-330. This particular handheld does not create a drive letter on the computer, so it requires special steps to upload the files to the InfraWare platform using the IDC.
Requirements
- Olympus DSS Player 2002 or above installed
- IDC v2009 installed
Before You Begin
Set your User Settings:
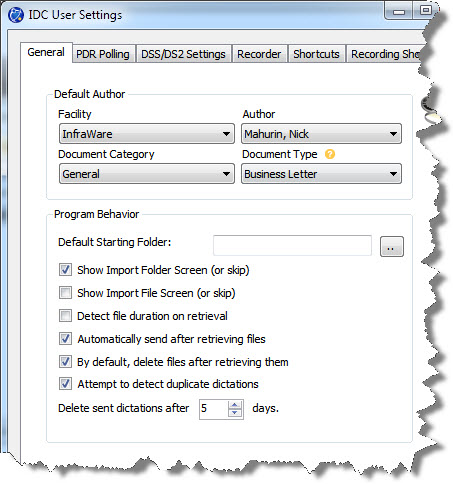
- Choose the default Facility and Author
- Put a checkmark next to "Automatically send files after retrieving files":
- Files will automatically send after they have been retrieved from the DS-330.
- Put a checkmark next to "By default, delete files after retrieving them."
- Files will be deleted from the handheld after retrieval.
- Put a checkmark next to "Attempt to detect duplicate dictations"
- The IDC will try to help the user to avoid uploading the same dictation more than once.
- Delete sent dictations after ____ days. -- After this number of days, the IDC will delete the files from the IDC.
-
Tasks:
- Plug the handheld recorder into the computer.
- Using your login and password, log in to the IDC.
- Be sure the Olympus Software does not open. If it opens automatically, close it.
- Click on the "3" button.
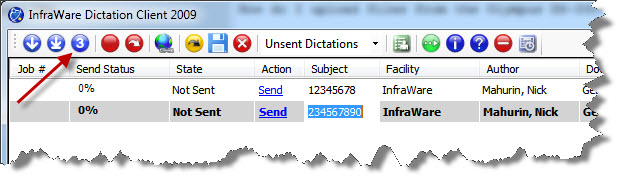
- The window below will open.
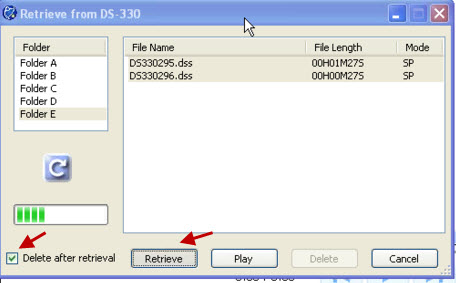
- Click on each folder to determine where the dictation files are located.
- Put a checkmark in "Delete after Retrieval" to delete the dictation files from the handheld.
- Click Retrieve.

- Choose the Facility, Author, Document Category and Document Type from the drop-down menus.
- Put a checkmark next to STAT to mark the jobs STAT.
- Put a checkmark next to "Delete after Retrieval" to delete the files from the handheld.
- Click Save.
- Back on the Main Window, if the files don't automatically begin uploading, click the Send to InfraWare button:
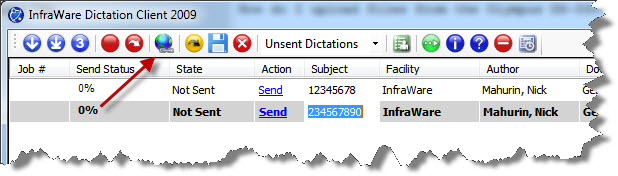
- The files will send to the InfraWare platform and job numbers will appear as confirmation.
|
| Related KBs |
|
 |
What audio files does InfraWare support?
Supported Audio Formats Explained |
|
How do I setup a hand held upload workstation in the IDC?
How to Setup a Handheld Upload Workstation (IDC) |
|
Quick Start Guide: InfraWare Dictation Client (IDC)
Getting Started in the InfraWare Dictation Client (IDC) |
| Last Updated |
|
| Friday, December 28, 2018 |
